Native Garden Project Finished- Woohoo!!

I had a date this morning – with 40 bags of Grade A cedar mulch.  Fortunately I didn’t have to tackle it alone.  My husband opened and poured while I raked and spread.

Just to recap………

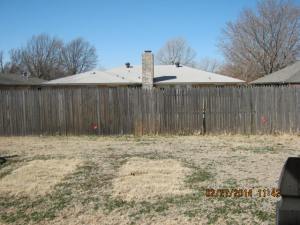
This is what we started with about 6 weeks ago.

This is what we started with about 6 weeks ago.

Next came a back wrenching day with the sod cutter that gave us this….

After setting border

After setting border

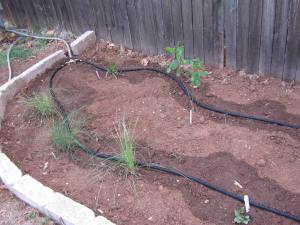
Then the native plants were in place and the soaker hose laid down….

The trial run was a success.  Even, drippy moisture.

The trial run was a success. Even, drippy moisture.

And today- ta da!!!- mulch!!

The plants are young and it was almost impossible to get the 3" depth the landscaper suggested.  And we should have evened up the surface a little more.

The plants are young and it was almost impossible to get the 3″ depth the landscaper suggested. And we should have evened up the surface a little more.

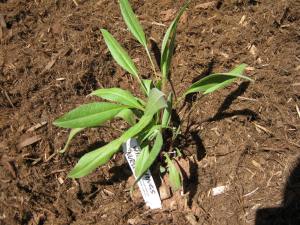
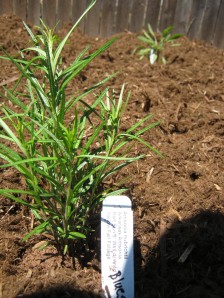
Here are a couple of closeups….

Goldenrod

Goldenrod

Ozark Bluestar

Ozark Bluestar

Here is the complete list of natives we planted: purple muhly grass, prairie rose, hibiscus, penstemon, goldenrod, coneflower, blue sage, joe pye, bergamot, beautyberry, false indigo, Ozark bluestar and prairie blazing star.  And of course, an Eastern redbud tree.  I don’t expect any blooms this year, but everything is still healthy after being in the ground almost two weeks.

So…..on to the next project.  No rest of the wicked.  Since we still had a LITTLE energy left after laying the mulch, we cleaned the old mulch and inches of spilled birdseed out of the old beds next to the patio and spread mulch on them.  Oh, did I mention that we only used 29 of the 40 bags.  There was no way we could have used them all – and I cut down the number from the 50 the landscaper told me to buy.  Then around to the front yard where I planted this is my grandmother’s old washpot.
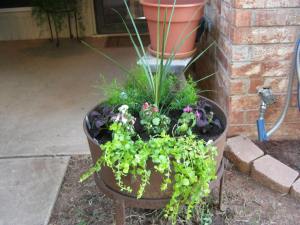
I lovethe tall Spike in the middle.  Behind it is aspargus ferns, Black Dragon for contrast, impatients and Moneywort.

I love the tall Spike in the middle. Behind it is aspargus ferns, Black Dragon for contrast, impatients and Moneywort.

My husband cut the seat out of this old chair in the large bed in the front.  I zip-tied a basket with coconut husk liner, but ran out of potting soil.  I’m not sure what I’m going to plant in it.  There’s  not much to choose from for shade plants.

IMG_1070

This should be really nice with plants “growing” out of the seat.

Speaking of potting soil, I’ve never really found one I like that will hold moisture.  I found this at Organics OKC.  Pricey, but hopefully worth it.

IMG_1073

Lots of good stuff in it. Should have for $18 a bag.

I’m off to email my native plant images to Habitat Hero in Colorado.  Although Oklahoma doesn’t have a local chapter, they are interested in native gardens everywhere.  Susan J. Tweit is one of the founders.  She’s been my inspiration.

So,what else is on the list….vacuum, clean bathrooms (ugh), laundry, fresh sheets on the bed, work on baby quilt….refill tea glass, lay down, turn on Netflix, watch episode of Foyle’s War.  Yeah, I like that list better :).

Simple blessings to all!


The Natives Make Me Restless

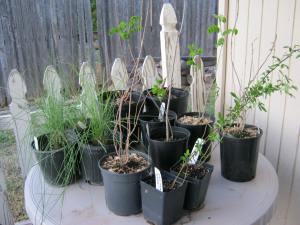
Forty-five native Oklahoma plants were delivered yesterday! Forty-five!!!!  Guess I lost my head a little. Now to get them in the ground. Feeling just a little overwhelmed and restless to get out there in this gorgeous weather.  It’s an absolutely wonderful day out there – light breeze (okay, so its windy, but after all, this is spring in Oklahoma) sunshine, perfect temps.

Wild bergamot, goldenrod, and friends

Wild bergamot, goldenrod, and friends

Climbing Prairie Rose, Hibiscus, Muhly Grass

Climbing Prairie Rose, Hibiscus, Muhly Grass

Didn’t realize the Prairie Rose was the climbing variety.  Will have to re-think a location for it.  I guess I will have to wait until the irises bloom and wither, then remove some of them and plant the rose to climb up the post of the pergola.  The challenge will be keeping them alive in their plastic pots for a while.

Can’t wait to see the new bed finished.  Got the False Indigo planted last night before it got too dark to see what I was doing.

Okay, back to work.  Have a simple kind of day!


Patience with an Attitude

Patience is not the ability to wait, but the ability to keep a good attitude while waiting – Unknown

I will be the first to admit that patience is not a virture I possess.  Once I make a plan, I want fruition now, thank you very much. My latest test of patience is our new backyard landscaping project.

Image

I posted this picture a while back.

After hours battling a sod cutter and hauling loads of crumbling clay and grass, resulting in sore muscles, liberal applications of ice packs and downing of multiple Ibuprofen, this was the result.

IMG_0427

You get the general idea of the curves.

Anybody want some free dirt ?

Anybody want some free dirt ?

Last weekend, after riding 33 miles in a bicycle fund raiser, my husband helped me haul 65 concrete edgers to the back yard, load after heavy wheelbarrow load.  We hit it again Sunday afternoon and got the last one in place just as it started to rain.

I'm really pleased with the result.

I’m really pleased with the result.

Don’t know if you can see it, but there is a very young redbud tree planted in the corner.

Bloom wannabe.

Bloom wannabe.

We’re living in redbud heaven right now.  The Oklahoma state trees are in their full glory, blooming in colors ranging from light pink to dark fuchsia.   I think the one we planted will be the light pink variety.  I love the lacy airiness of the mature tree.

Our's should look like this in a few years.

Our’s should look like this in a few years.

The blooms stand out against the bright green new leaves and still bare branches of trees around them. They show up everywhere- in landscaped lawns and the natural wooded areas that line local creeks.

Now comes the patience part.  It will be another two weeks before my young native plants can be weaned from the greenhouse at  Wild Things Nursery.

Since we are at a standstill, we decided to take a trip to the Texas hill country. We’ll go visit my Dad’s grave at the little cemetery in Buckholts, stop in at Green’s Sausage House in Zabcikville (don’t you love that name?) to stock up on the best German sausage and kolaches you’ve ever put in your mouth, and then tool up the road to the Walker Honey Farm in Rogers. My parents grew up in this tiny town (population 1000 as long as I can remember) where my sister and I spents weeks every summer, visiting grandparents and cousins and fighting about who got to sleep on the foldout sofa or the rollaway cot. I think the best part of our trip will be a driving tour of the Marble Falls area where the bluebonnets and Indian paintbrush are supposed to be at peak.  I need a good dose of the Hill Country.  What few roots I grew, I grew there.

May have to rethink the retirement-in-the-mountains plan.


Clay Pot Irrigation – Part 2

Well, the pots are in the ground and I have planted onions, spinach and lettuce (yes, I know its a little late for these crops but I never read instructions or I would have planted the spinach weeks ago – darn it)

I have a 4’x8′ bed and five pots.  Using the diagram posted in Clay Pot Irrigation Part 1, I figured 16″ between pots so I would need 5 pots.  For once I did the math correctly. 

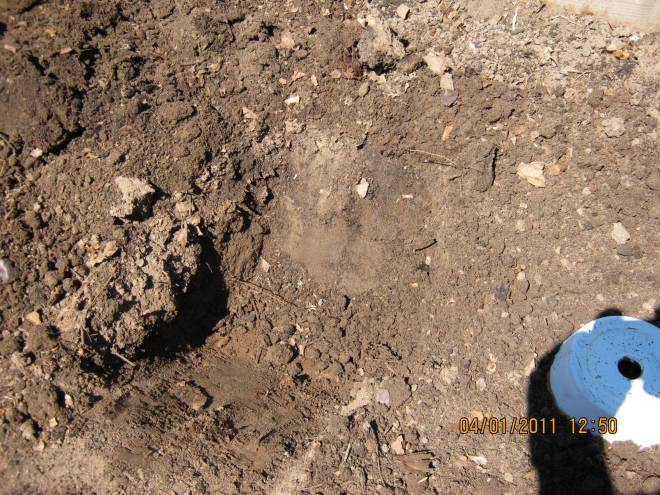
The holes needed to be pretty deep.  I ran into some old tree roots I had forgotten about.  Hope they don’t suck up all the water and starve my onions.

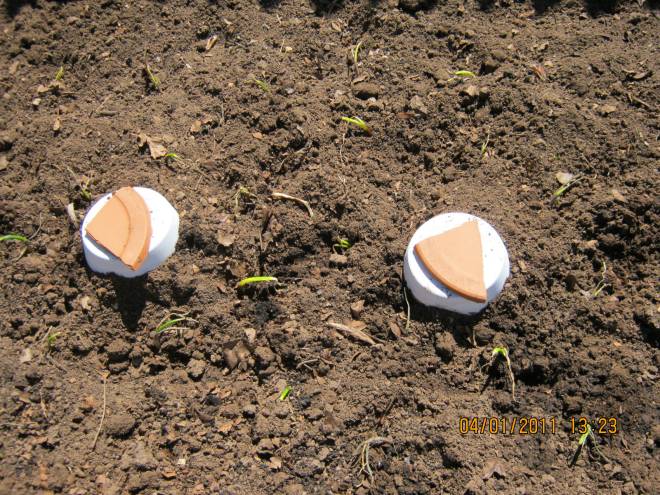
Here’s what they look like all sunk into the beds.  Next time – IF I do this again, I will paint a little further down on the tops than I did this time.  I have a feeling I am going to be rearranging the dirt a lot to keep the clay covered.

I busted an old clay saucer and used the pieces to cover the holes – to keep mosquitoes from breeding and other bugs out. 

The green sprigs are the onion tops.  I planted in a circle around the pots and along the edges of the bed because the water radius is supposed to be 16″ and I felt like I was wasting space in the bed by not planting something.  I filled the pots with water once they were in the ground and then watered the newly planted plants and seeds to get them started.  Justin at Little Homestead in the City very kindly replied to my email question on this topic.  He said they surface water until the plants get big enough to reach the pots, then they let the pots take over.

That was all done yesterday afternoon.  This morning I went out to check water levels in the pots.  Remember from Part 1 that I said I checked for leaks only on one of the pots?  BIG MISTAKE!!!  If you decide to make DIY ollas, check ALL of them for leaks!!!  Two of my pots had water levels low enough that I could not feel it with my finger; three of them were pretty much still full.  DANGNABIT!  You know what I really want to say.  Just use your imagination.   So, I have 2 pots that are pretty much going to be useless.  I’ll still have to surface water in those spots.  One was my lettuce and one of my onion areas.  There is no way I’m digging those babies up at this point.  They can just sit there all summer.  When I dig them up in the fall, I’ll reseal them for next year. 

So, at this point, the one bed is all I’m going to invest time and money in for the clay pots.  If  the whole system works well, I’ll do more next year and WILL TEST EACH AND EVERY ONE FOR LEAKS.  AAHHHGGG………

So, in spite of the frustration, I also got my potato bed planted – never grown potatoes before.  I found tomato plants at the nursery yesterday when I went back for more soil. Its a little early but they were going like hotcakes and not to be left out of the frenzy, I bought three.  They’re in the ground and looking a little shocky, but hopefully will perk up.  The bell pepper plants are in as is the cilantro.  I LOVE cilantro.  Grew some last year and really enjoyed it. 

About May 1 the okra and cantalope will go in and that’s it.  Something else I made sure to do this year was mark on the calendar when each veggie should be ready to pick.  Being so new at this its hard to tell how big to let something get before picking it.  So having it on the calendar will give me an idea of when its time. 

Hope you’re all having fun getting your own gardens going.  You know, it would be great to get some comments.  I have readers, but very few ever respond or comment on anything.  Is anybody out there?????

Keep it simple, ya’ll.

Clay Pot Irrigation – Part 1

I was recently perusing one of my favorite websites, Little Homestead in the City, and came across a blog post about ollas, or clay pot irrigation.  The whole concept, which has evidently been around for a few thousand years (leave it to me to just be finding out about this), is fascinating. 

The idea is that a porous clay pot is planted in the ground or raised bed and filled with water. Plants are planted around the pot and the roots grow to the source of water.  The water wicks out of the pot through the pores and waters the plants directly to the root system.   A rock (or something like a scrap piece of broken pot) is placed over the hole to keep mosquitoes out.  The pot is refilled as needed depending on temperatures, rainfall, etc. 

According to the Permaculture Research Institute of Australia, there are a lot of good things about the method including 50-70% water savings, guards against water stress, does not over irrigate, less frequent watering is required, less weeding since weeds do not prosper as the soil surface remains dry throughout the growing season (interesting!), saves on fertilizer if it is applied as part of the water used to fill the pots (can you put liquid worm fertilizer in there?  must research this!), the soil of the seedbed does not get sealed due to water impact but remains loose and well aerated, and last but not least, clay pots can be installed on undulating ground where surface water runoff might be a problem. 

The Aussies also site some disadvantages such as potential for winter breakage if left in the ground in areas with a winter freeze – definitely a possibility here in Oklahoma and prolonged use is likely to decrease porosity of the clay pot if used in heavy soil. 

Here are a couple of very helpful charts that were on the Australian site.

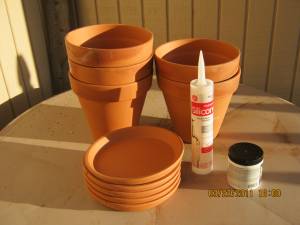
Sounds to me like the pros outweigh the cons.  As much as I would LOVE to buy the cute ollas found at Peddler’s Wagon, they are a bit out of my price range.  I have three raised bed and will need 4-5 for each.  So after a search for DIY ollas, I made a trip to my local Home Depot for pots.  Let’s just say, I’ll be buying my next round at a local garden shop where I found them the next day for about 1/2 the price!  Here is what I bought for about $45.

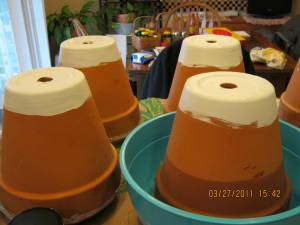
Standard UNGLAZED clay pots, saucers, silicone and white paint.   The paint is to seal the part of the pot that sticks up out of the ground to keep water from wicking out the top.  That was a tip I got from someone’s blog that said they learned the hard way.  Sounds like me. 

They were not cheap.  Each pot was $4, saucers were $3.  But I figure if I can get 5 years use out of each pot and with money (and heat stroke) saved from reduced watering, the upfront investment will be worth it.  I also discovered a couple of used pots in the garage that I can clean and use.  One thing to watch out for when buying the pots: I found that a lot of the saucers had what appeared to be hairline cracks and some of the pots did, too.  Don’t know how that would affect the process or the strength of the pot, but just kept looking until I found five pots with no cracks.  Anyway, if I’m paying four bucks apiece, they need to be intact, thank you very much. 

The first step is to seal the saucer and pot together to make one unit.  It takes one bead of silicone on the lip of the pot, squish down, and then a bead around the seam on the outside.  Let dry according to the directions on the silicone.  Mine said 12 hours which was overnight and then some.

It’s not pretty but this part will be underground.  Next came a leakage test.  I didn’t do the test on each pot.  I figured if one sealed, they all did.  Hope I’m right.

No leaks!

Next I painted about 2″ down from the top on each pot as well as the top (which of course is really the bottom of the pot).  The pots will be planted with the saucer down and water filled through the hole.

You can see the water wicking through the sides of my test pot. Pretty cool.

So, this is as far as I’ve gotten.  The weather has been cold and cloudy and the weatherman says we may have one more overnight freeze this week.  I should have already had my onions and lettuce and spinach out, but I’m always slow getting started in the spring.  Hopefully, I’ll be able to get the pots in the ground Thursday this week and can show you Part 2. 

Until then, keep it simple, ya’ll.

Doody Calls

Sorry, couldn’t resist the pun.  Doody – or chicken manure is now in the raised beds.  The instructions said to just spread it on top of the soil and water well.  Yea!  No backbreaking work in that. 

I also got the watering system set up, but its not perfect.  Three sprinklers are hooked up with connecting hoses to one faucet.  The first one gets lots of pressure – too much water for the #1 bed when its just right for the other two further down the line.   Will try putting a splitter on the faucet and operating them separately.  Will still have to water other areas by hand, but this system will lighten the load during the extreme heat of the summer.  I wanted to get it set up before I planted so as not to injure young plants.  Trial and error time again.  The story of my life. 

Next step is to buy my onion and potato sets and get them planted along with lettuce seeds.  Its still a little cold but I’m going for it.  Okra will wait until the middle of April.   

Just an update for anyone interested in the process.  Urban agriculture!!!!

Keep it simple, ya’ll.

Almost There

This is what met my eyes when I walked out the door this morning.  Cue birdsong and woodpecker tapping.  The buds are ALMOST open.  In a few days this very lopsided Bradford Pear tree will be in full bloom.  While all the other trees still appear to be dormant, local pear trees – and believe me there are LOTS of them around here – are trying very hard to get Spring underway.  Come to think of it, I haven’t seen any tulips this year.  Must have missed them because they always precede everything else.  Next will be the redbuds – absolutely gorgeous and the state tree of Oklahoma; again, very prolific.  And then the irises.  I love irises.  I have yellow and purple in my yard.  The blooms don’t last long but they are truly beautiful while they last. 

My sedum is beginning to put on some serious growth.  It never really goes dormant here.  I cut it back every winter but there are always some low lying green buds just on the surface.  It made it through the extreme temperatures this winter. 

I think I’ll go to the local nursery today at lunch and buy a few bags of manure to work into the veggie beds tomorrow.  Next comes planting for onions and lettuce. 

I also need to get serious about pricing DIY guttering.  I’ve had two very nice rain barrels for a couple of years now, but haven’t gotten them hooked up for lack of guttering.  It might be a little pricey to get the whole thing up and running, but free water for the garden will be the tradeoff.

 The garden is going to be great this year – I can just feel it!

Keep it simple, ya’ll.

Permaculture Dreams

We’ve had some lovely days here the past week or so, and some really cold, foggy ones, too.  But its obvious spring is fighting to make headway and I’m cheering her on.  I’m mentally more than ready to start planting in the raised beds.  I need to add some manure when the weather warms a bit more and really work it in good.  I’ve got my watering system all worked out – I think.  I won’t really know until I get it all in place.  It will mean having some hoses stretched out in the yard all the time, which will be an issue with the One Who Mows, but in my opinion, its worth having to go out and hold some things out of the way.  Actually, what I’d REALLY like to do is get the backyard full of raised beds so there is no need to mow because there is no grass!  I’d also like to take down the tree in the front – how many times have you read that here – and plant fruit trees. 

My problem is that I don’t want to put a huge amount of effort into this place when there is a very real possibility that we may be moving in a couple of years.  I really really really really really want a little land – a couple or three acres to go hog wild with the permaculture thing.  Graywater system, fruit trees, water catchment, worm composting – and so much more I don’t even have a clue about.   When the Kid graduates from college and is hopefully settled for a while, we can make the decision about whether to sell our suburban home and move out a ways or maybe even leave the state.  I’d so love to live someplace within driving distance of some actual scenery of the mountain variety.   But that means a totally different growing climate and pretty much reinventing ourselves – which I’m okay with.  

I found a couple of new websites I’d like to share and a couple of old ones to inspire you to do the small things every day to live more simply, eat better, do more for your neighbor and get in touch with nature.

urbanorganicgardener.com

naturalhomemagazine.com (evidently they’ve been around for years)

bulgarbugle.com (our local food cooperative founder/also a permaculture guy – need to talk to him…….)

southernplate.com – yummy deep south cooking!

thepioneerwoman.com – Oklahoma girl on the farm

and just to inspire you once again – urbanhomestead.org – the be all and end all for urban organic gardeners wanting to live real

another inspiration – dailyacts.org – the younger generation may be getting it right after all!

This one is really cool – hope to able to use their stuff one day soon!  oksolar.com –

Keep it simple, ya’ll

TEDx Manhattan Webinar – Changing the Way We Eat

I spent the whole day today – and I mean the WHOLE day – sitting in front of my computer watching a webinar all about sustainable food; the current food system in the US, the problems, the solutions, the people involved in small and not so small ways.  I was totally inspired.  One huge plus was the ongoing chat with over 100 people through Facebook.  There are a lot of people in this country striving every day to put locally grown, healthy REAL food back on our tables and in our kids’ school lunches. 

I must say I’m pretty brain dead from all the information, but I took some great notes and have lots of websites to visit.  I was proud to be able to tell my chat friends about the Oklahoma Food Cooperative.  Its been a model for other states in setting up distribution systems that connect farmers with consumers.  We have over 3000 members now and it continues to grow every month.  

From what I read, the whole conference should be available on the TED livestream site in about a month.  Write it on your calendars and take a look if you’re even remotely interested in local food production – I’m going to go plan my garden for this year!  There may still be snow on the ground, but I can almost taste that organically grown tomato from my backyard, the sweet cantalopes and the crunchy okra! 

Our Regional Food Bank has what is called Plant-a-Row, where individual gardeners can donate fresh produce to partner food pantries in their area.  I’ve signed up and can’t wait to help feed the hungry in my community with healthy veggies.   Go online and see if there is a program like this in your area.  We who are blessed with the space to grow food should pass that blessing along!

Have a great weekend everyone.

A Ridiculously Long Time

Yes, its been a ridiculously LONG time since I’ve posted anything new here.  June 3rd, to be exact. 

A lot has happened in the last 2-plus months.  The garden has been growing exponentially on a daily basis.  Okra! Okra! Okra!  The tomato plants are big and green but VERY few tomatoes have made it to the table.  What’s up with that?  We’ve gotten 5 very nice cantalopes and have a few more on the vine.  My late season onions did nicely.  I will plant all three beds in the spring and try to sell them.  The squash bloomed magnificently but failed to produce a single fruit – or vege.  Fruit sounds more poetic, don’t you think?  Anyway, we ain’t got no squash.    Some random vine keeps trying to overtake my spirea (sp?) and I have to remove it daily.  The “ever-bearing” strawberries blessed us bountifully in June (just like the “June bearing” variety) and haven’t been seen since.  The heat has just about killed them.  I really need to get out there and thin out the bed, but its so dang hot.  Day after day after day of temps over 100 degrees.  It makes it really hard to water.  I try to wait until the sun goes behind the trees about 8 p.m., but as soon as the water hose comes out, so do the mosquitoes.  I refuse to spray myself with the chemical stuff and instead use a locally produced natural ingredient repellent, but if you miss even one small spot with the stuff, the little biters find it and attack and its repellent properties are only good for about 15 minutes.  Whine whine whine….. My Mom was right about the blackeye peas.  You need to plant A LOT of them to get enough to eat.  Out of the whole bed I planted, only 3 plants came up (soil too cold and the seed rotted), but the vines of those 3 amigos have grown wild. Even so, they haven’t produced enough for a single meal even at this point.  So, note for next year:  no blackeye peas; plant okra in a straight line, not in a bed.  Too itchy and scratchy reaching in to pick.  Plant tomatoes in a different spot.  One bed for cantalope and one for squash.  

We finally got to take a vacation in August.  DH and son had a great time hiking and rafting on the Rio Grande while I suffered mightily at a 3 day quilting retreat in Angel Fire, NM.  The torture consisted of uninterrupted creative sewing time, gourmet meals

Just one of the sumptuous desserts!

and reacquaintance with friends made at a Santa Fe retreat in ’07.  Such suffering!! 

Notice the deck and pine trees outside the windows!

 I got an entire quilt top finished in 2-1/2 days, got in some serious gift shopping for the neighbor caring for the critters, and was awed and amazed at the quantity and beauty of the local hummingbirds.  That’s something you just don’t see in Oklahoma.  The first night we were there it rained and thundered and was so chilly we had to put on sweaters.  Most of the women were from the Texas panhandle, as were our hostesses.  You know you’re around a bunch of true Texas women when the conversation during Meet and Greet turns to the prolificacy of rattlesnakes this year!  Then there were the “Albuquerque 3”.  They kept us laughing the whole weekend.  It was wonderful.

So, now we’re back home.  Laundry is semi caught up – okay, is laundry ever caught up?  And I’m SOOOOOO ready for the garden to stop producing for this year.  My Mom says, “Just pull it up!”, but there is something inside that won’t let me destroy plants that are still producing food for my table.  Especially the okra.  Its almost blasphemy to pull up plants that are still offering up those sweet pods that are so good fried just to the point of being burnt.  Crunch, crunch, yum……