Well, the pots are in the ground and I have planted onions, spinach and lettuce (yes, I know its a little late for these crops but I never read instructions or I would have planted the spinach weeks ago – darn it)
I have a 4’x8′ bed and five pots. Using the diagram posted in Clay Pot Irrigation Part 1, I figured 16″ between pots so I would need 5 pots. For once I did the math correctly.
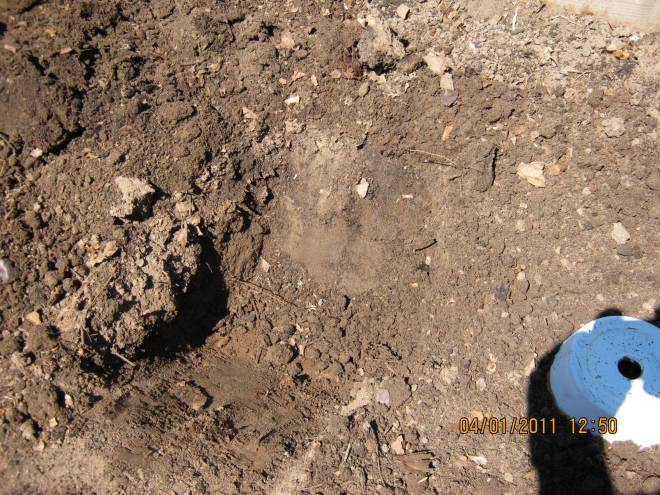
The holes needed to be pretty deep. I ran into some old tree roots I had forgotten about. Hope they don’t suck up all the water and starve my onions.
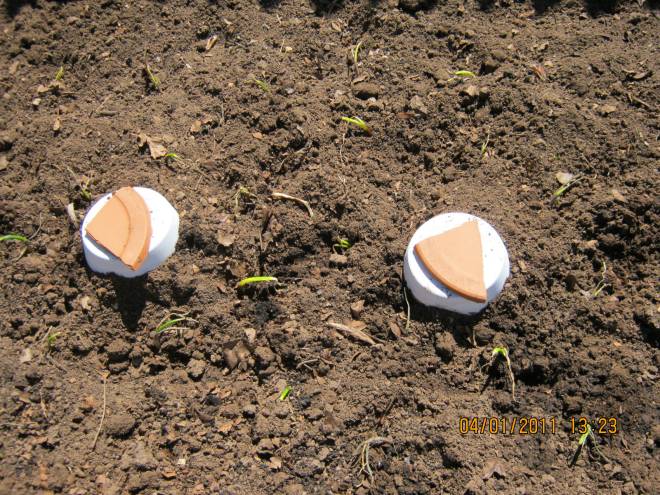
Here’s what they look like all sunk into the beds. Next time – IF I do this again, I will paint a little further down on the tops than I did this time. I have a feeling I am going to be rearranging the dirt a lot to keep the clay covered.
I busted an old clay saucer and used the pieces to cover the holes – to keep mosquitoes from breeding and other bugs out.
The green sprigs are the onion tops. I planted in a circle around the pots and along the edges of the bed because the water radius is supposed to be 16″ and I felt like I was wasting space in the bed by not planting something. I filled the pots with water once they were in the ground and then watered the newly planted plants and seeds to get them started. Justin at Little Homestead in the City very kindly replied to my email question on this topic. He said they surface water until the plants get big enough to reach the pots, then they let the pots take over.
That was all done yesterday afternoon. This morning I went out to check water levels in the pots. Remember from Part 1 that I said I checked for leaks only on one of the pots? BIG MISTAKE!!! If you decide to make DIY ollas, check ALL of them for leaks!!! Two of my pots had water levels low enough that I could not feel it with my finger; three of them were pretty much still full. DANGNABIT! You know what I really want to say. Just use your imagination. So, I have 2 pots that are pretty much going to be useless. I’ll still have to surface water in those spots. One was my lettuce and one of my onion areas. There is no way I’m digging those babies up at this point. They can just sit there all summer. When I dig them up in the fall, I’ll reseal them for next year.
So, at this point, the one bed is all I’m going to invest time and money in for the clay pots. If the whole system works well, I’ll do more next year and WILL TEST EACH AND EVERY ONE FOR LEAKS. AAHHHGGG………
So, in spite of the frustration, I also got my potato bed planted – never grown potatoes before. I found tomato plants at the nursery yesterday when I went back for more soil. Its a little early but they were going like hotcakes and not to be left out of the frenzy, I bought three. They’re in the ground and looking a little shocky, but hopefully will perk up. The bell pepper plants are in as is the cilantro. I LOVE cilantro. Grew some last year and really enjoyed it.
About May 1 the okra and cantalope will go in and that’s it. Something else I made sure to do this year was mark on the calendar when each veggie should be ready to pick. Being so new at this its hard to tell how big to let something get before picking it. So having it on the calendar will give me an idea of when its time.
Hope you’re all having fun getting your own gardens going. You know, it would be great to get some comments. I have readers, but very few ever respond or comment on anything. Is anybody out there?????
Keep it simple, ya’ll.


I found this article fascinating and inspiring thanks!
Maybe sraying with clear lacquer would allow the attractive terra cotta to remain. Very creative, the ones I found on line were 30$ and big shipping expence. I am going to try this with pumpkins since there is other info out stating to refrain from woody shubs.
ive recently found out about clay pot irrigation – how are things going for you now?
Steve,
Hope you’re having good luck with the clay pot irrigation. Unfortunately, mine did not work so well. I did not test ALL my pots before putting them in the ground and many of them leaked badly. I’ve also given up on trying to garden in my west-facing backyard. Everything just fries. I put 3 years of effort into it and learned a lot, though.
Inspired to try this, I added approximately 2 gallons extra storage for water, and it works!!!!
Here is how: :I bought $1.69 pots at Home Depo. the top of the pots I glued to the bottom of large plastic containers (which originaly contained protein powder.) Ofcourse I cut the plastic bottom out.by tracing a circle using the large end of the clay pot…. continued below
Since all my gravity watering pots match and are symmetrical in the way I have planted, they are actually very atractive evenly spaced in a row. Since they are so frugal perculating water I have used grocery store plastic to cover soil and retain moisture, We have had some rain here is Central Florida, which gets around and through the plastic and I accationally use compose tea,the collards seem to be growing and not wilting.
I think one watermelon plant surrounded by 4 of these pots will look great in the yard, but the question I want to settle is will they work in a dried up area of the yard in Florida with the plastic much, maybe over wet cardboard to start with.
I think one watermelon plant surrounded by 4 of these pots will look great in the yard, but the question I want to settle is will they work in a dried up area of the yard in Florida with the plastic much, maybe over wet cardboard to start with.
These tubs have a large screw on plastic lids which allows for easy access to see how water is draining (very slowly). The small hole end is sealed and the whole clay pot is planted in the middle of a large 25 gallon Nursery pot with three collard plants.arranged around.
The white plastic tubs look like they are just sitting on the dirt but the clay pot is underneath providing gavity self watering,this is more reliable than “wicking”water like self watering grow boxes do.
I had trouble with the first one but later sanded the plastic to better hold the large bead of clear sealer which needs to set “untouched ” for aatleast a day before curing.
I have two large Ollie pots I have assembled and ready to go….my plan is to place them both on either side of a struggling tree that is still small but has been in the ground for 8 years…do you think this will aide in it’s growth? I live in Albuquerque NM and this poor tree struggles for water while the other trees in the yard are doing pretty well.
It would be worth a try. But the fact that the other trees are doing well with the same amount of water the sickly tree is getting makes me wonder if there is something about the soil that might be different? Or maybe its just a tree that was sick from the start. It certainly can’t hurt to try the ollas, though. I’m no expert, please keep in mind :).